Not unlike many catamarans, they just don’t come from the factory with ample battery or solar to have the power capacity to sail and anchor for weeks on end. So, like many others, we decided to upgrade! Get the details below and from our videos. Use this information only as a guide on what to consider, not an explicit How-To. As you know, with boat repairs, you are on your own. We accept no responsibility for your actions:-)
Lithium Battery Installation – 300 AMP Each!
We replaced our AGM batteries with Relion Lithium on our Leopard48 ! Get the details on how to do it right. Well, at least we think it’s right.
We spent weeks on the design (in between other things in life). These were installed January 2020 and so far the results have been fantastic!

Steps to our Lithium Installation
- Install 1st alternator and regulator and test
- Repeat for 2nd alternator
- Remove one AGM and test fit Relion
- Install shunt mounting board
- Install circuit breakers
- Install battery monitor heads and cable to shunts
- Drill and mount new battery cable feedthroughs (6)
- Make and install battery cables and interconnect cables (12 + 2)
- Program Magnum and Outback
- Install batteries
- TURN IT ON AND PRAY!
Lithium Battery Project Materials
- Relion 300 AMP Lithium Batteries (3) – https://relionbattery.com/
- Balmar Series 60 Alternator and Balmar model 614 Charge controller (2 each)
- Victron BMV 712 Battery monitor (3, 1 each battery)
- Blue Sea 8610 ACR (automatic charging relay)
- Blue Sea 187 Series Breaker (1 each battery)
- Blue Sea PowerBar Bus Bar (2, 1 each for positive and negative)


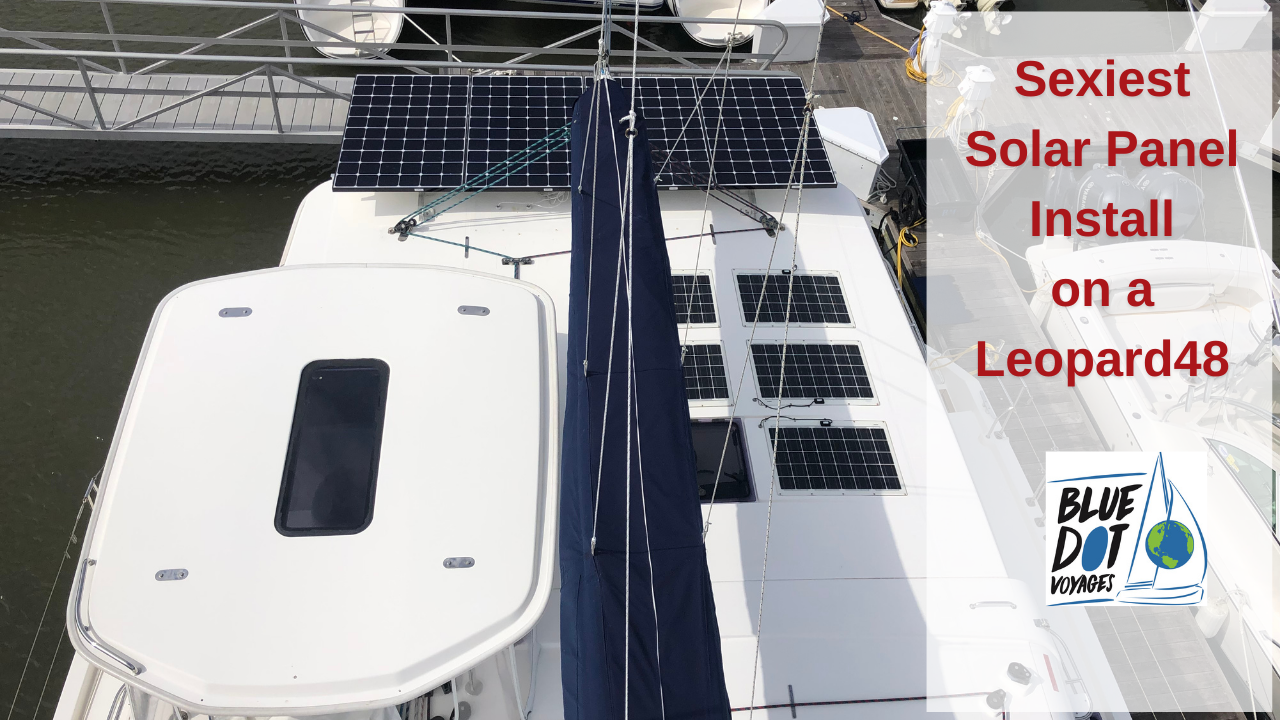
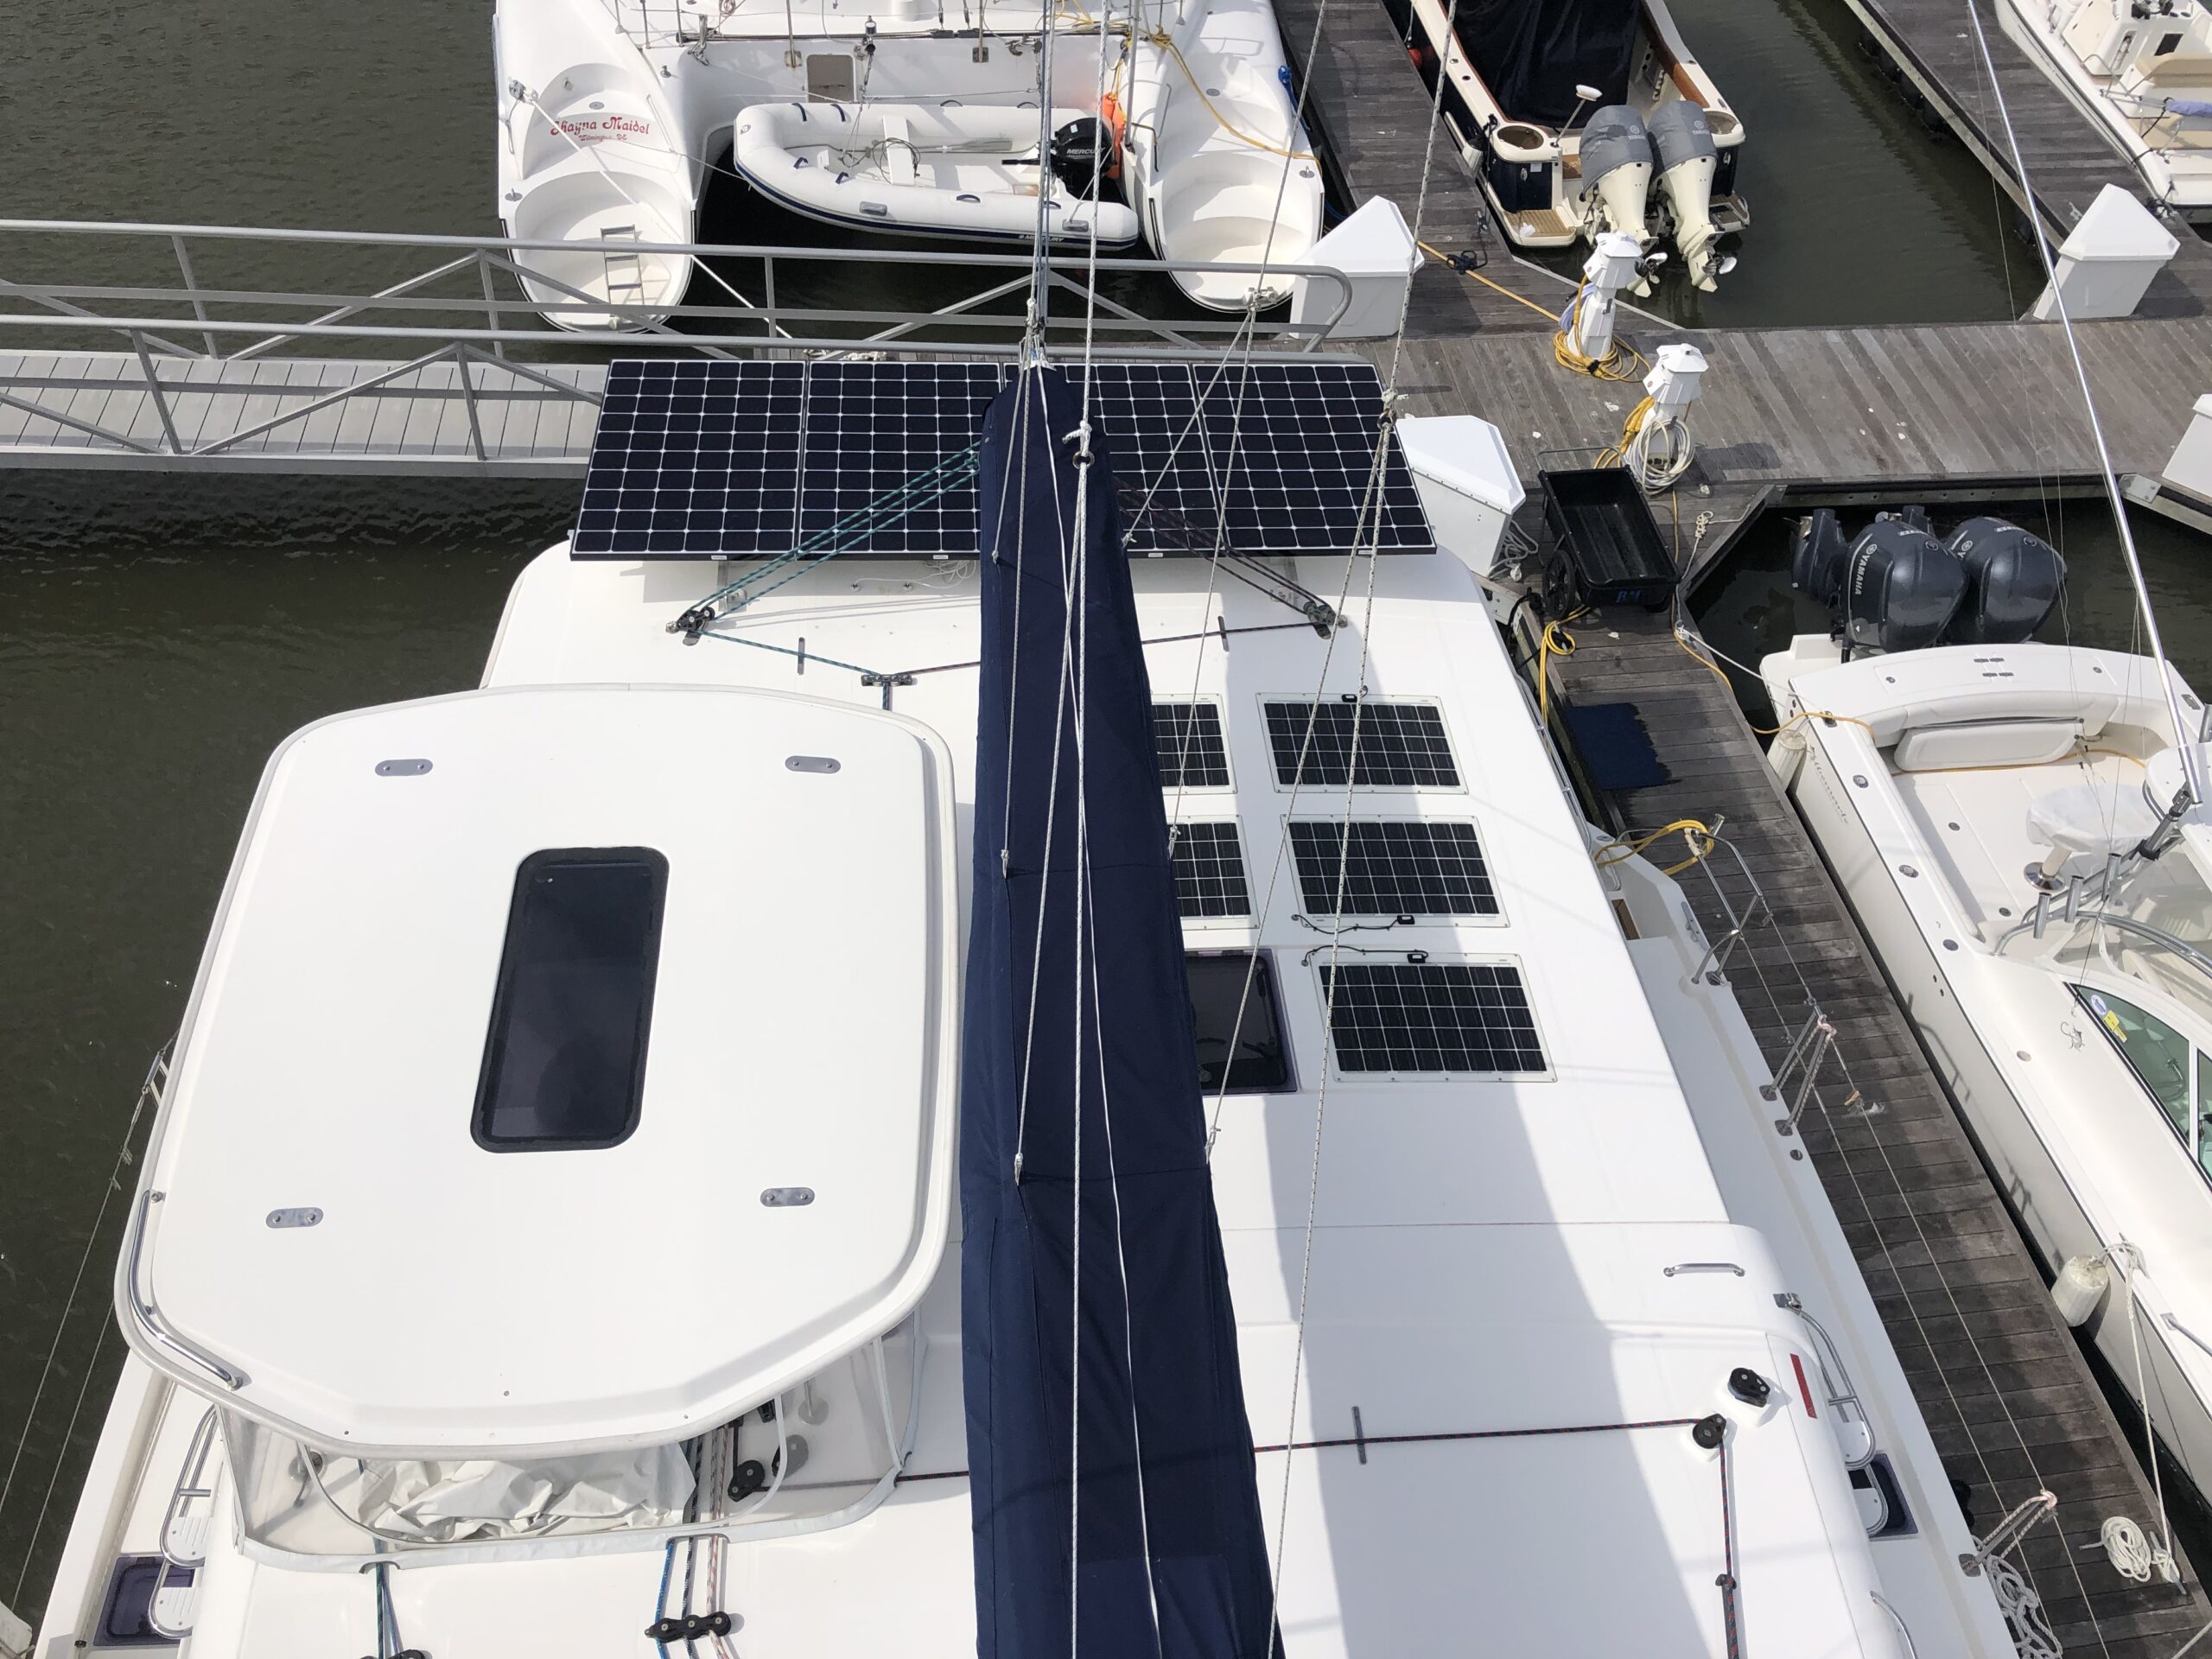
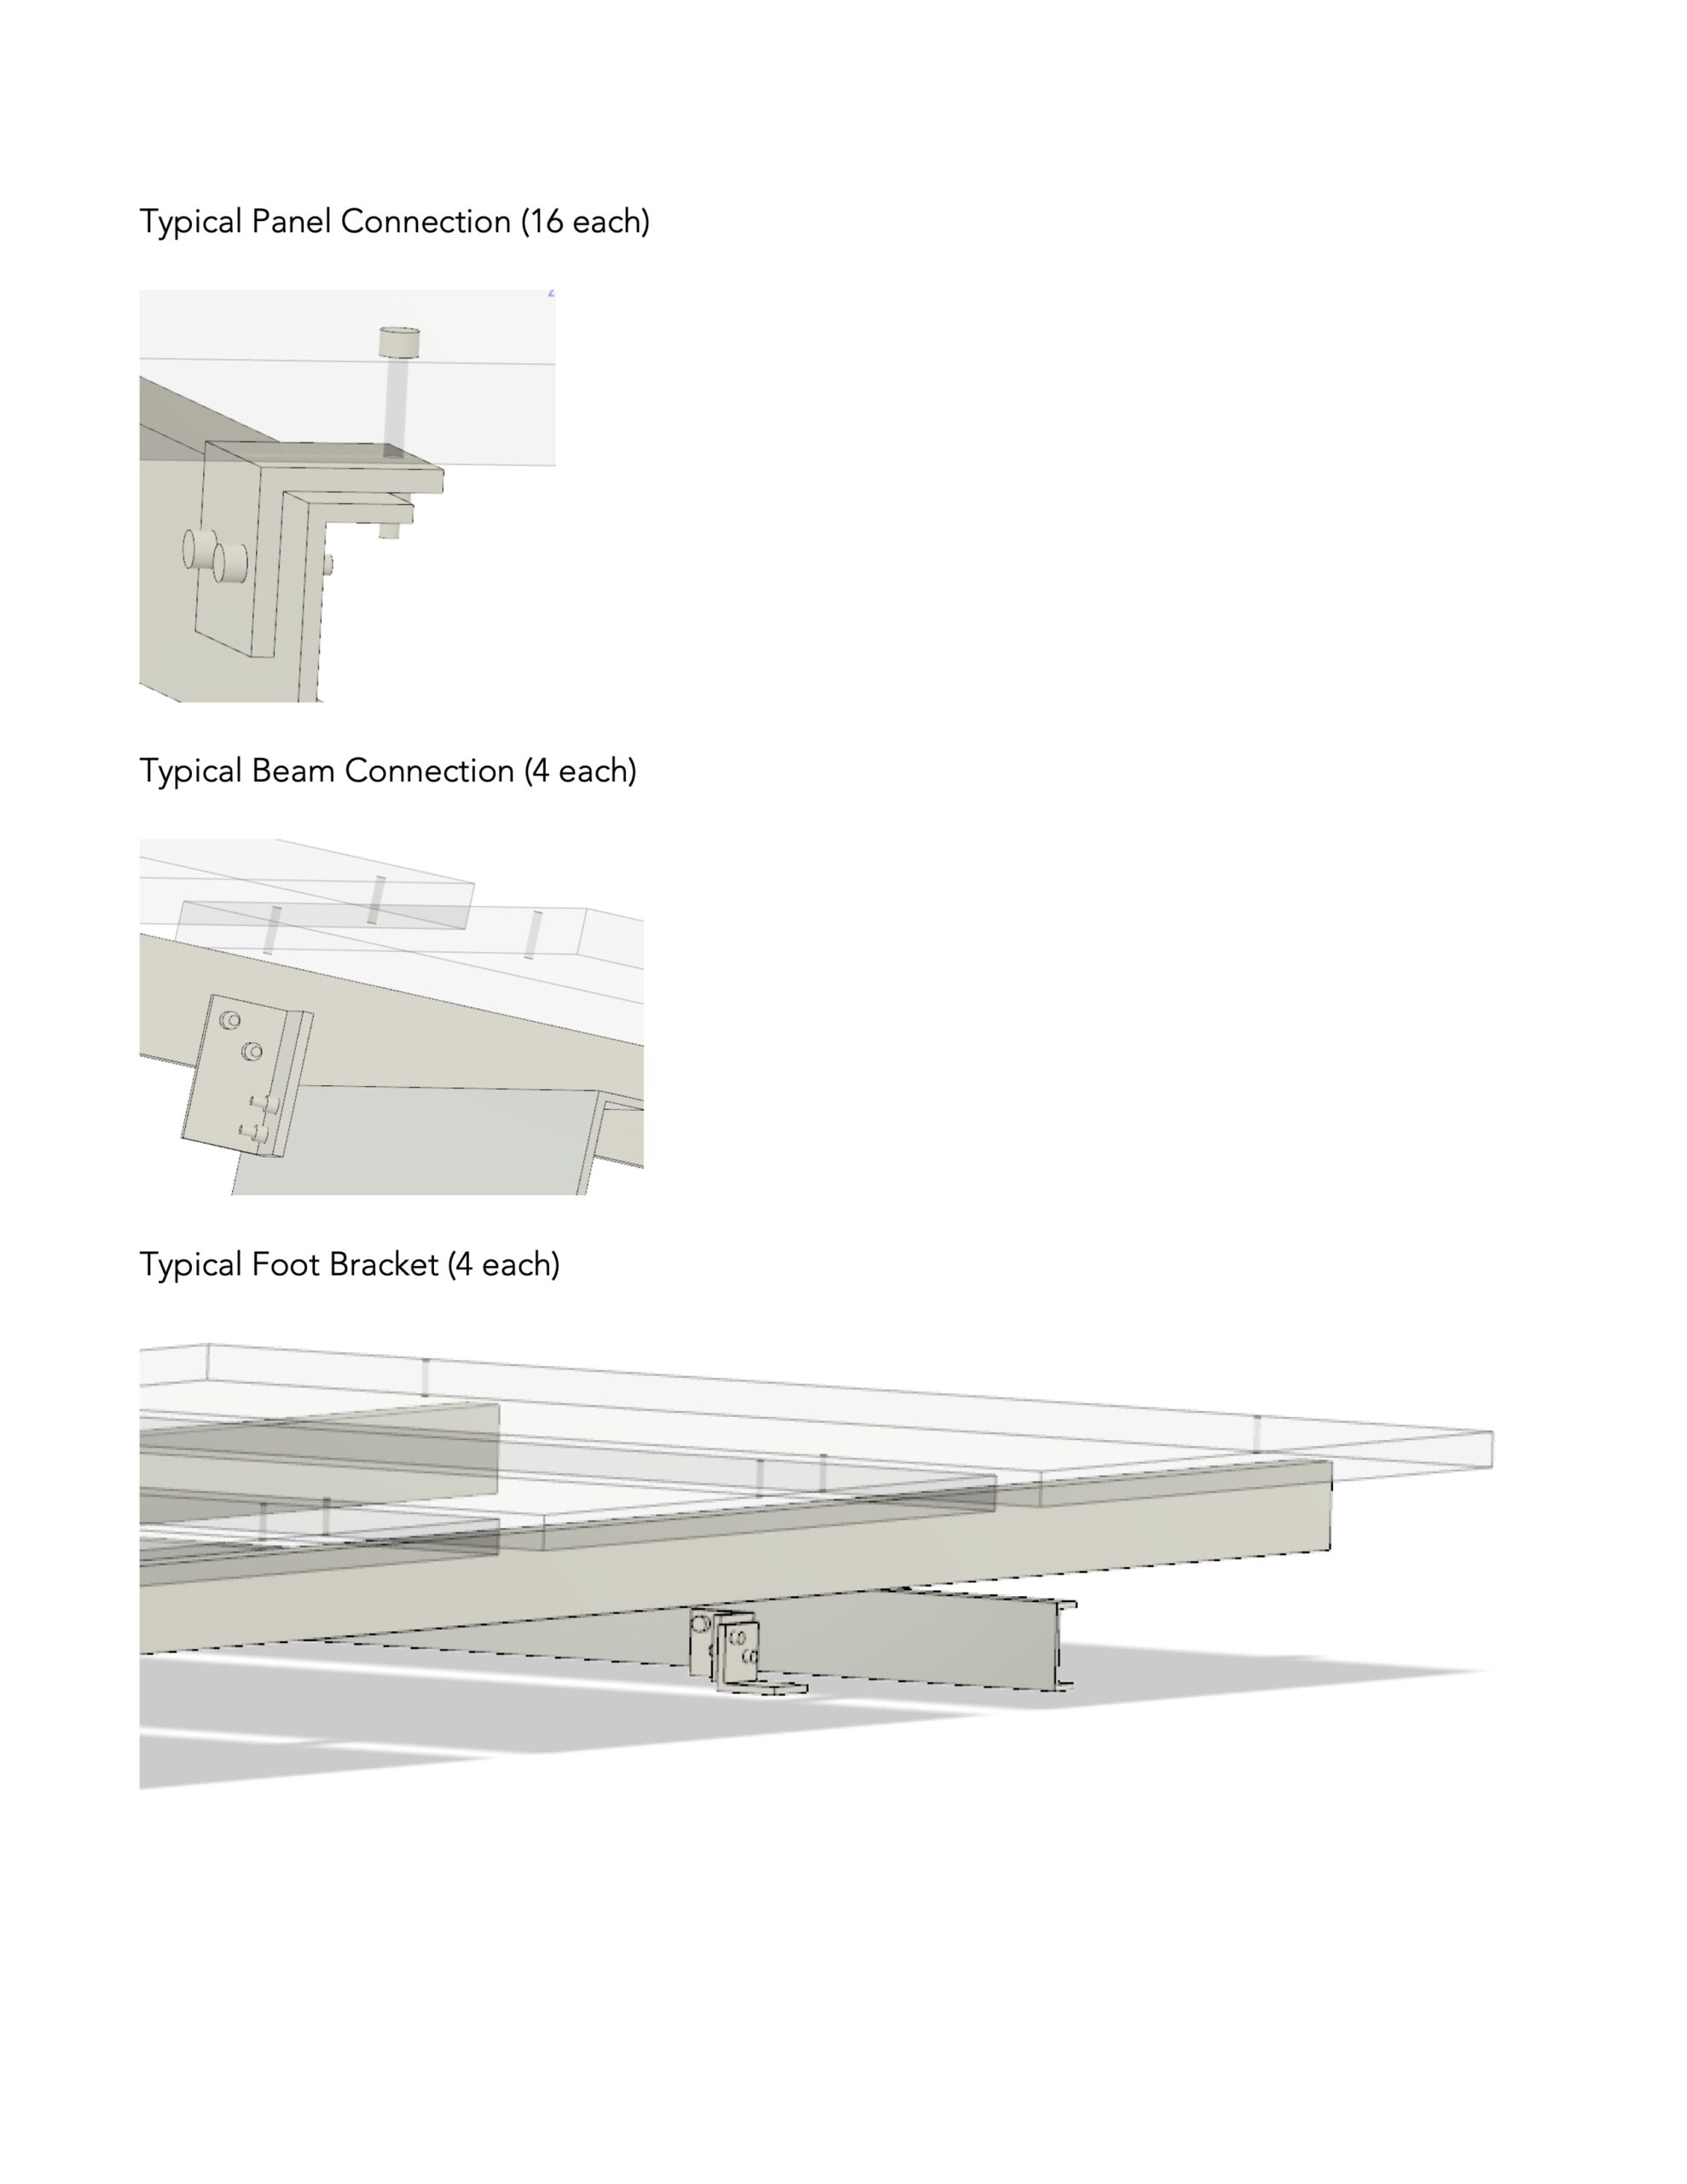
Solar Panel Installation – 370 Watt Each!
Our Leopard48 Catamaran came with several flex solar panels, which sound good on a list of boat features, in practice, did little to no good when you wanted to stay on anchor for an extended period of time.
So, like all good catamaran owners, we added more solar! Our goal was to generate enough power with a reasonable amount of sunshine to stay on anchor for weeks!
The video shows how we built the structure, talks about the reason we chose aluminum over stainless steel, and gives you the final view of the finished installation.
This project, combined with our lithium battery upgrade, means we can sail worry free (at least when it comes to power).
Solar Panel Capacity Estimate Calculations
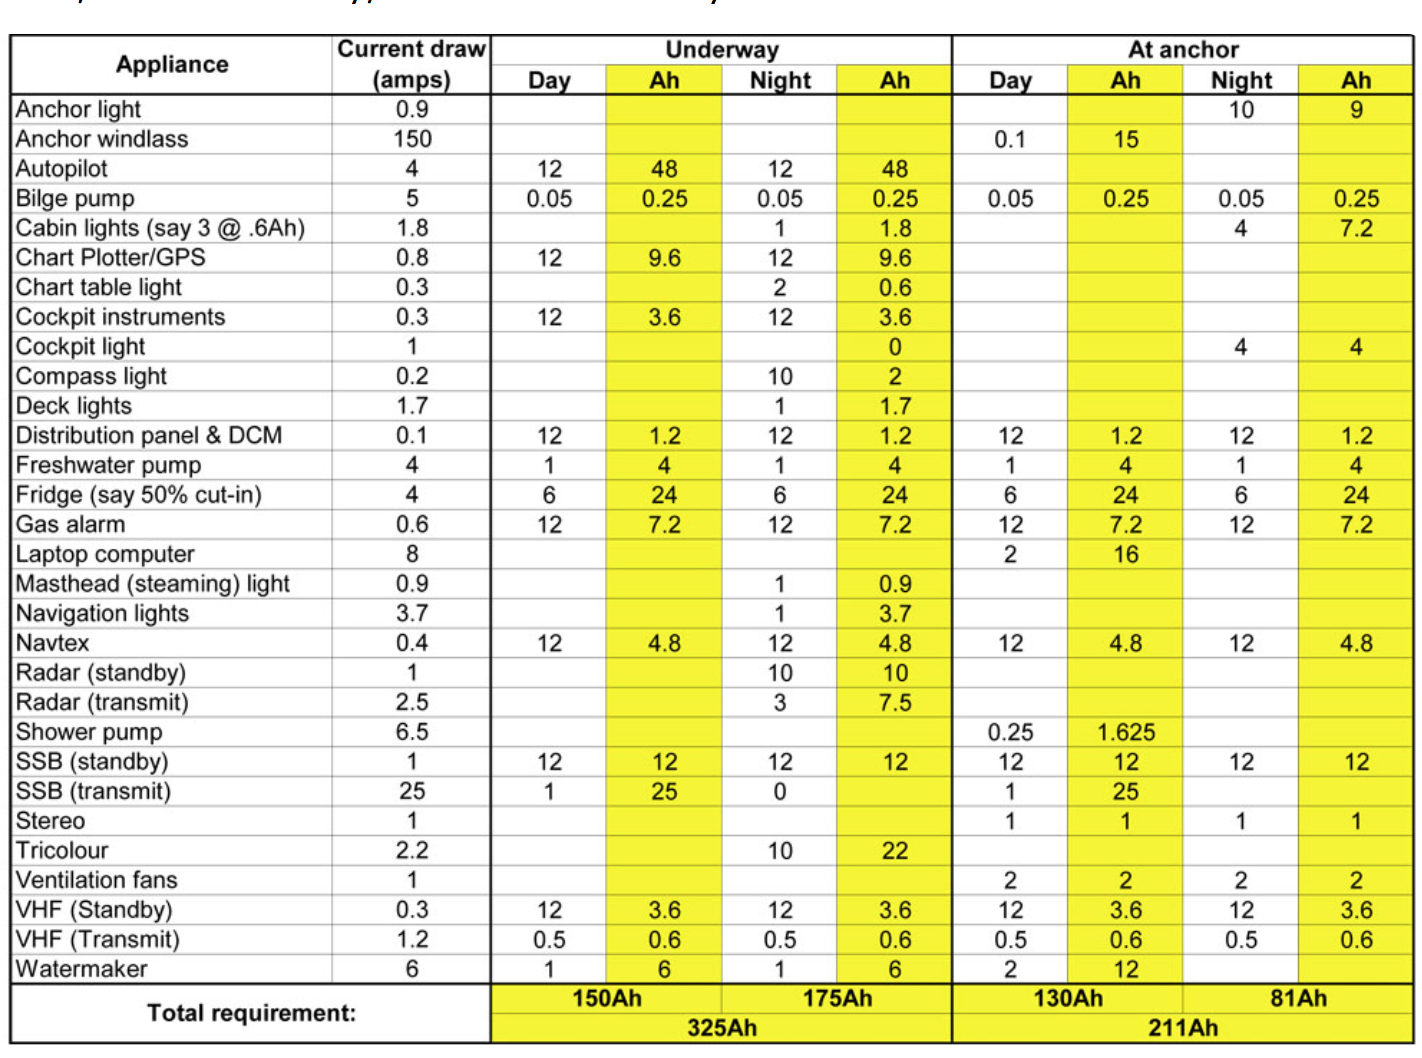
Power yield of a panel varies over a wide range based on season, latitude, time of day, incident angle (on a sailboat optimum angles cannot be achieved), cloud cover, and shading. Estimates for sailboat installations range from around 15% to 30% of rating over a 12 hour day. For example, four 360 watt panels might produce 2600 to 5200 watt – hours daily, potentially supplying 180 to 360 amp – hours to the DC system. This estimate is only good for reasonably clear days of course. During the day any surplus amperage over that being used by the boat will add charge to the batteries to cover night-time needs.
The above reality highlights the need to develop conservative power practice at sea if the desire is to substantially depend on solar and minimize the need to charge with the generator or diesels.
Working on a simple concept using 4” C channel (6061 Al) for the cantilever and 3” for the cross beams. Did simple beam calcs which show reasonable beam deflections and stresses assuming a uniform load of 500# each panel. This load yields around 1500# force (down) on column backing plate and around 500# (up) on forward attachment point which we would create. Of course the normal load of around 50 lb per panel would yield a tenth of these loads.
Working on attachment alignment options. If we restrict ourselves to using a single bolt on the existing column backing plate we don’t have to deal with the plate rotation angle. From there we can either plan to do on-site fabrication or template work, or create a leveling plate at the four points using studs and jam nuts.
The stacked C-channel structure provides the best strength and simplicity but results in a panel to top spacing of at least 8”. If we create a flexible (leveling plate) mount that probably adds 3 or 4” more.
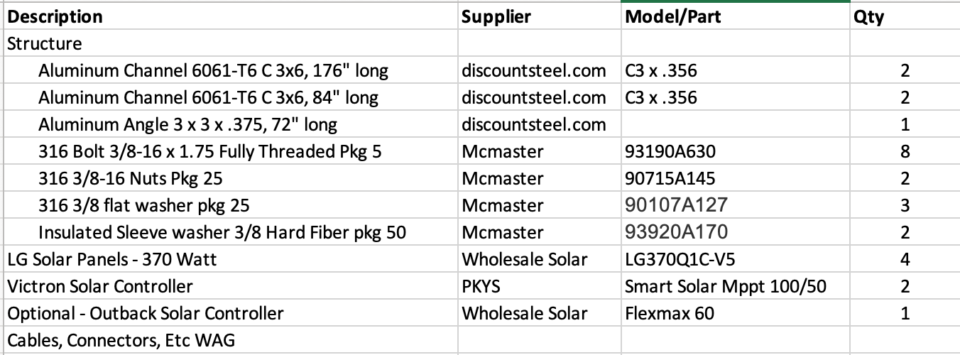
Solar Panel Materials

